
Suppose you're THREATENING something - perhaps CHECKMATE - but an enemy piece is DEFENDING the THREAT.
You have to find a way to get rid of it.
But how? Let's take a look.
 `
`
|
|
In this lesson we're going to look at some more really violent ways of killing your opponent's pieces. Suppose you're THREATENING something - perhaps CHECKMATE - but an enemy piece is DEFENDING the THREAT. You have to find a way to get rid of it. But how? Let's take a look. `
|
|
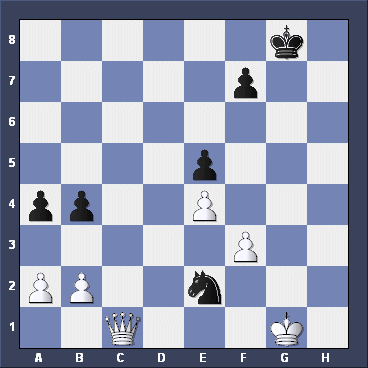
Here's a simple example.
Qh4xh7 would be CHECKMATE but for one thing. The pesky Black Knight on f6! So what do we do to get rid of it?  


|
|
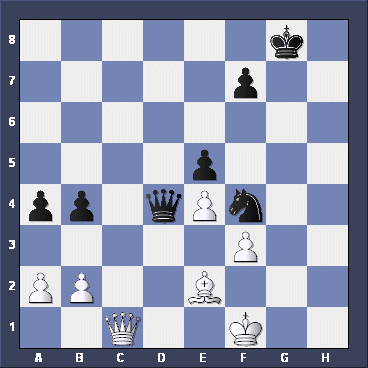
It's very easy, isn't it? We DESTROY the defender by killing it with our Bishop. Now Black has a VERY BIG PROBLEM. If he takes the Bishop with either the Queen or the Pawn, Qh4xh7 is CHECKMATE! Meanwhile, White THREATENS both the King and the Queen. Very bad news for Black.
|
|
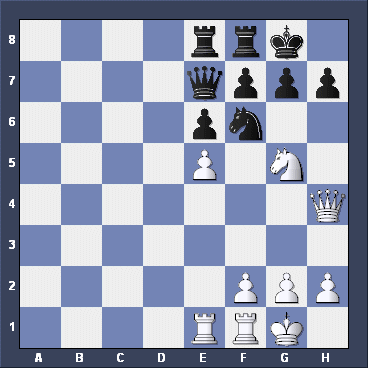
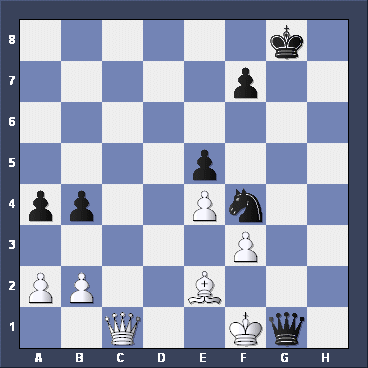
Now we've changed the position slighly. What should White play this time?
|
|
Yes, it's another really violent move! Again you can DESTROY the Knight - this time with your Rook. Of course a Rook is worth more than a Knight - but as you get CHECKMATE if he takes the Rook it really doesn't matter, does it? Just like last time, Black's King and Queen are both under threat.
|

|
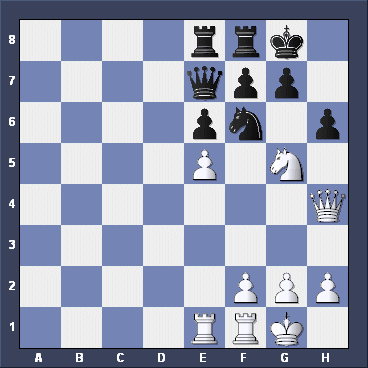
This time we can't DESTROY the defending Knight. So we have to do something a bit more subtle instead. Can you find the winning move for White?
|
|
This time we can't DESTROY the Knight so we use a DECOY instead. We THREATEN the Knight in the hope that it will move away. Then we'll be able to get CHECKMATE. A DECOY is a way of distracting another piece by giving it something else to do.
|
|
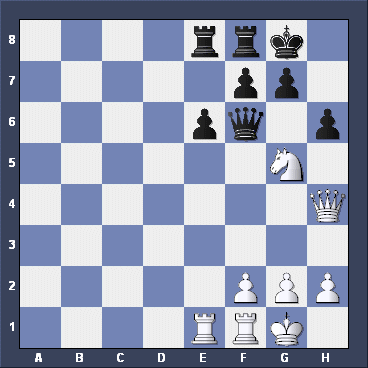
Black can defend by playing h7-h6, THREATENING the White Knight and stopping the CHECKMATE. Now play might continue: e5xf6 h6xg5 f6xe7 g5xh4 e7xf8=Q And White comes out ahead. But instead of taking the Knight, Black can play Qe7xf6.
|
|
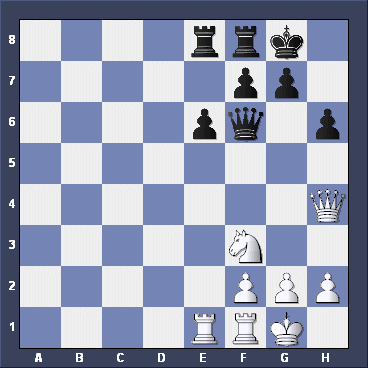
White's up by a Knight for a Pawn, but his Knight is both THREATENED and PINNED. He's got a way out, though. Can you find it?
|
|
Congratulations if you found the correct answer: Ng5-f3. Conveniently, White was able to move his Knight to a square on which it DEFENDS his Queen. So he remains a Knight for a Pawn ahead.
|

|
Nor can he THREATEN it and hope it moves away. So what can he do instead?
|
|
This time the DECOY works in a different way. White CAPTURES the Knight on d7 which was DEFENDED only by the Knight on f6. If Black takes back, it's CHECKMATE! Black's Knight on f6 is an OVERWORKED PIECE - it has to DEFEND both d7 and h7 at the same time. Maybe you're clever enough to do two things at once. But the Black Knight can't!
|
|
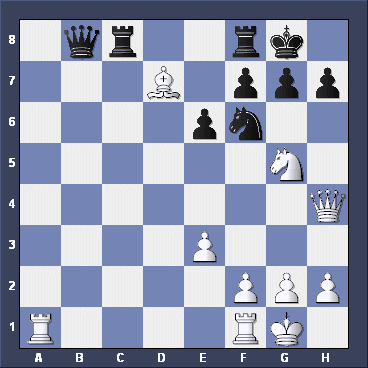
Here's another example. Again it's White's turn. Can you find the killing move?
|
|
Well done if you spotted the KNIGHT FORK! Usually a KNIGHT FORK works by FORKING two more valuable pieces. But this time it also acts as a DECOY. If Nf6xd5, of course Qh4xh7 is CHECKMATE. And if the Black Queen moves to safety, White CHECKMATES in two moves: Nd5xf6+ followed by Qh4xh7.
|
|
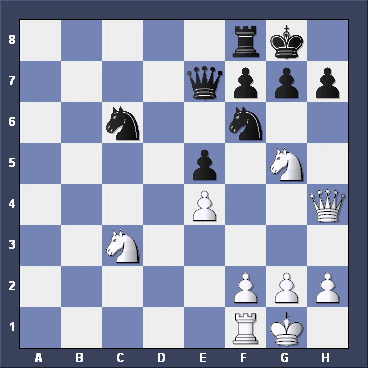
What should he play?
|
|
Of course it's an easy question, isn't it? Black takes the Bishop - and it's a KNIGHT FORK - next move he'll take the Queen as well, finishing a Knight ahead. But how did this come about? Let's go back a move.
|
|
|
|
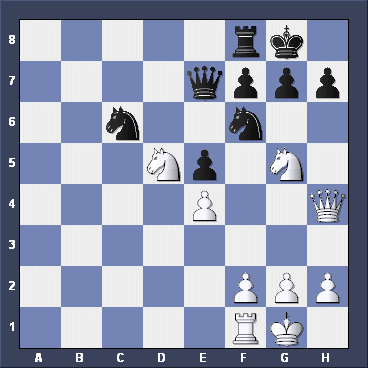
Wow!!! If you got it right you've just played a brilliant QUEEN SACRIFICE. At first it looks really dumb to put your Queen where White is forced to take it for nothing. But if you LOOK AHEAD you'll see that it's a DECOY - the King is forced to move to a square where he'll be FORKED next move. Black gets his investment back with interest.
|
|
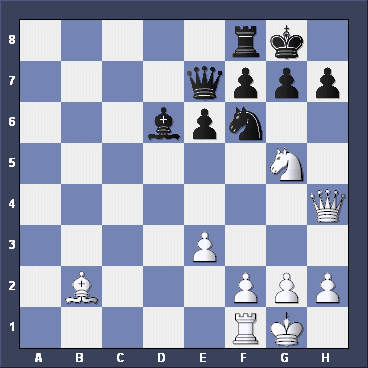
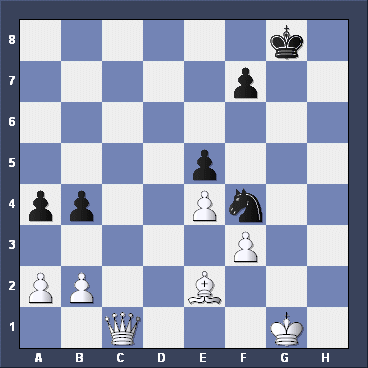
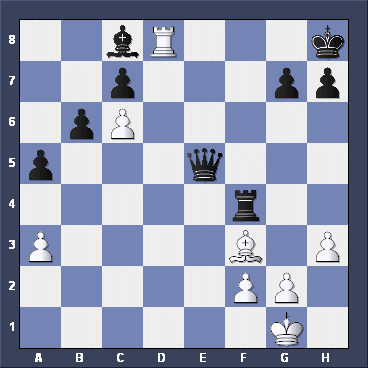
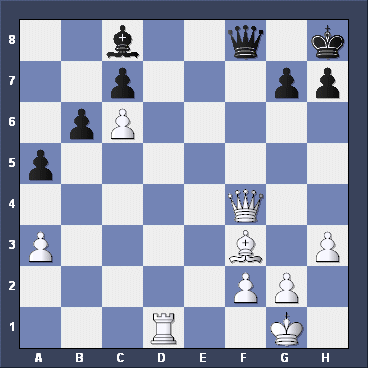
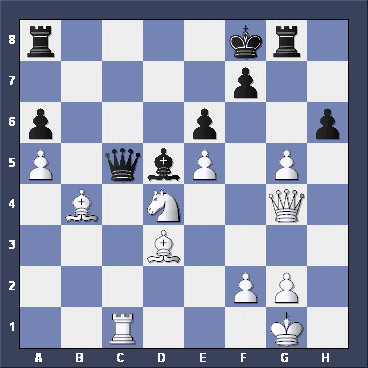
Now let's work through another example together. Tell me, what should White do in this position?
|
|
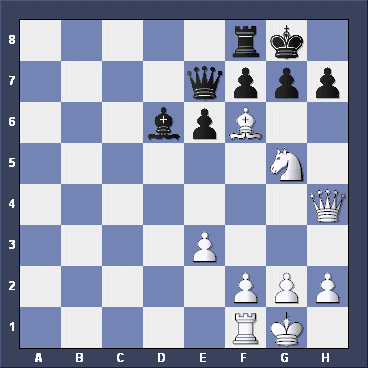
Again, it's a very easy question, isn't it. Although White's a Queen behind, he can get a BACK RANK MATE in two moves time. Did it happen by accident? Did White lose his Queen and win because of Black's mistake? We'll go back a move and find out.
|
|
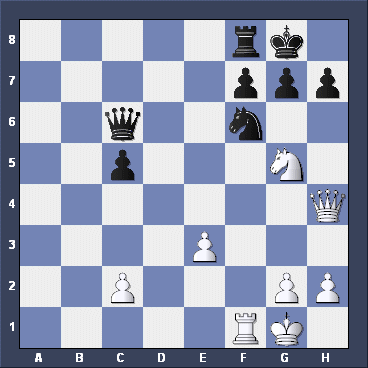
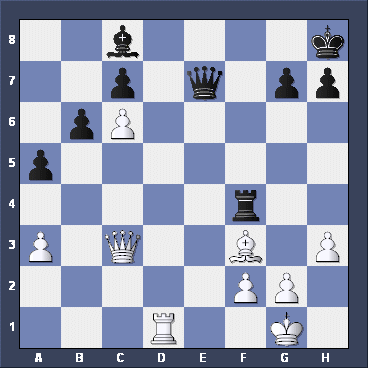
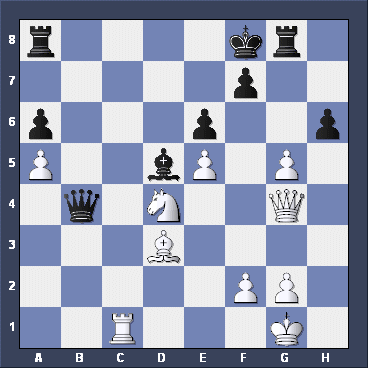
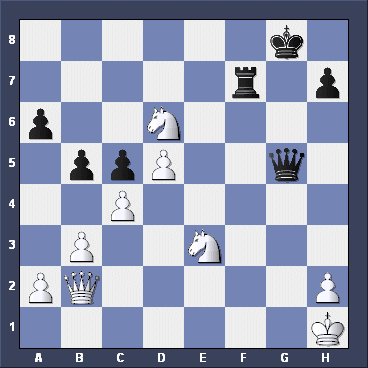
If you remember what's just happened you'll be able to find White's brilliant move in this position.
|
|
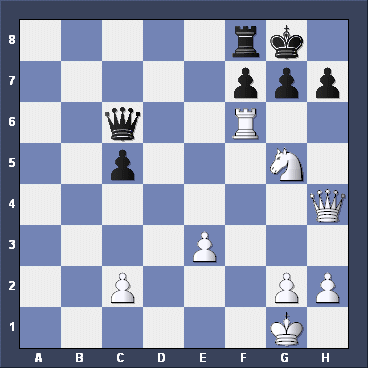
If you played Qc3-e5 you've just SACRIFICED your Queen again!! Qc3-e3 is just as good so you get a point for that as well. But playing the flash move is the way to impress your friends! This time White plays a QUEEN FORK, and if Black captures the Queen he finds his Queen's been DECOYED away from controlling the d8 and f8 squares. OK, another question coming up.
|
|
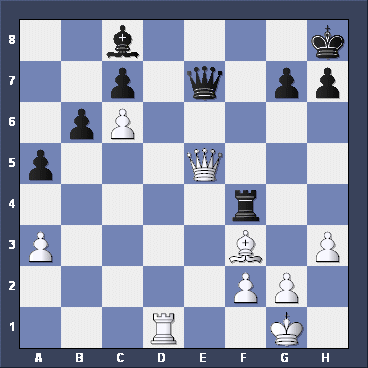
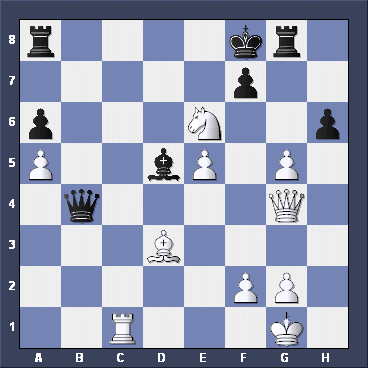
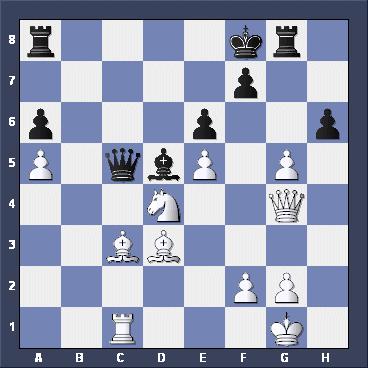
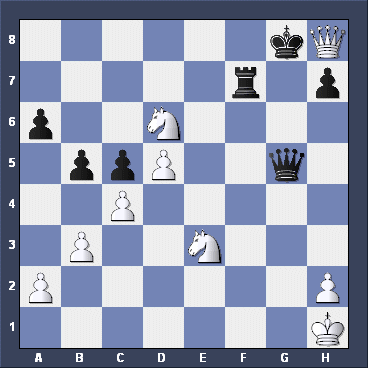
If Black plays Qe7-f8 to defend both pieces White has the chance to play ANOTHER QUEEN SACRIFICE! Can you find it?
|
|
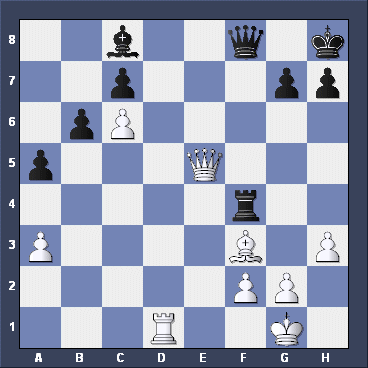
Yes, we capture the Rook, DECOYING the Queen away from the BACK RANK again. If he takes the Queen he gets mated again. Learning to think ahead is one of the most important skills you need for playing chess well. Practising solving positions like this will help you develop this skill.
|
|
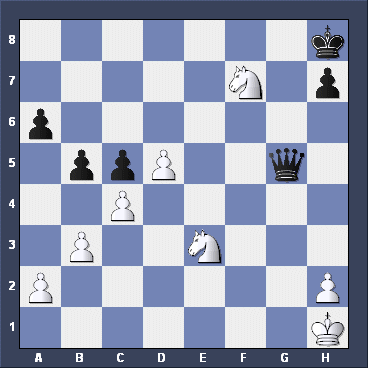
|
|
The White Knight moves away to CHECK the Black King while opening up a line for the White Queen to take the Black Queen next move. Black MUST get out of check - and next move White kills the Queen. Easy!
|
|
It's White's move here - tell me what he played.
|
|
The PIN acts as a DECOY to lure the Black Queen into an AMBUSH. Complicated? Yes, it is, but chess is a complicated game. Just like war.
|
|
Can you do as well. (Nd6xf7 is good, but there's something even better.)
|
|
Another fantastic QUEEN SACRIFICE!! Black has no choice - he must take the Queen. Do you see what's going to happen next?
|
|
The Black King's been DECOYED into a KNIGHT FORK!! White is going to come out a Knight and a Pawn ahead with an easy win. Try to look out for chances to play moves like this in your own games!
|
|
|
Congratulations!! You have now completed the DECOY & DESTROY assignment.  
|